


This guide will provide you with valuable tips on how to find the best real estate photographer for your needs, or how to take stunning DIY photos that highlight the unique features of your home. From lighting techniques to staging, and from camera settings to photo editing, we’ll cover everything you need to know to ensure your property stands out in a crowded market. A well-photographed home not only attracts more potential buyers but also helps in securing better offers, making the effort well worth it.
Whether you are a first-time seller or a seasoned property investor, these insights will equip you with the knowledge to present your home in the best possible light—literally and figuratively.
Why Real Estate Photography is Essential for Home Sellers
In today’s digital age, high-quality real estate photography is no longer just an option—it’s a necessity. A staggering 79% of recent home buyers reported to Swiss Property Owners Association that they began their home search online, making your property’s photos the first impression potential buyers will have. Of those who purchased a home in the last 12 months, nearly half indicated that viewing professional photos was extremely or very important to their home-buying experience.
In a competitive market, your home’s online presence can make or break a sale. Professional, well-composed photos not only capture the essence of your property but also help it stand out among countless other listings. These images are often the first thing potential buyers see, and they play a crucial role in piquing interest and driving them to visit your listing in person.
But the value of great real estate photography doesn’t end with your online listing. These images will also enhance your property’s appeal across various platforms where it’s advertised. From eye-catching Sales-Expose and to social media posts that your friends, family, and real estate agent share, high-quality photos amplify your home’s visibility.
In essence, investing in top-notch real estate photography is one of the most effective ways to ensure that your home gets the attention it deserves, helping you attract serious buyers and secure the best possible offers.
Understanding Real Estate Photography Pricing
Investing in professional real estate photography is a crucial step in effectively marketing your home. On average, you can expect to pay between CHF 300 and CHF 800 for a professional photo shoot, though these prices can vary depending on your location and the size of your property. Factors such as the photographer’s experience, the number of photos required, and additional services like drone photography or video tours may also influence the final cost.
If you choose to work with us as your selling partner, we offer professional photography, including drone pictures, home staging, and virtual tours, all at no additional cost to you. We understand the critical role high-quality visuals play in selling a home and include these services as part of our comprehensive package. When you partner with us, we handle all the logistics—from arranging the photographer to coordinating the photo shoot—allowing you to concentrate on getting your home ready for sale, stress-free and at no extra charge.
The investment in professional photography is often well worth it, as well-taken photos can significantly enhance the appeal of your listing, attract more potential buyers, and ultimately help you secure a quicker and more profitable sale.
How to Prepare Your Home for Real Estate Photography
Whether you’re hiring a professional photographer or taking the DIY route, preparing your home for real estate photography is the crucial first step. To capture your property in its best light, it’s essential to make your home look as appealing as possible. After all, even the best photography can’t compensate for a cluttered or unkempt space. Here’s how to get your home photo-ready:
1. Deep Clean Every Room
- Why It Matters: Cleanliness is non-negotiable when it comes to real estate photos. A spotless home conveys care and attention to detail, which can translate into higher perceived value.
- Action Steps: Whether you hire a professional cleaning service or tackle it yourself, ensure every room is thoroughly cleaned. This includes washing windows (inside and out), making beds with fresh linens, dusting surfaces, vacuuming floors, and polishing stainless steel appliances to remove fingerprints.
2. Declutter the Space
- Importance: Clutter distracts potential buyers from the home’s features and can make rooms appear smaller. Clean, clear spaces allow the architecture and design elements of your home to shine.
- Action Steps: Clear kitchen counters of small appliances and unnecessary items, tidy up bathrooms by storing personal items out of sight, and eliminate any visible cords or wires. Tuck away TV remotes, tidy up mail piles, and don’t forget to organize spaces like the garage or workshop if they will be photographed.
3. Depersonalize the Home
- Reasoning: Buyers need to envision themselves living in the home, which can be difficult if they’re distracted by your personal belongings.
- Action Steps: Remove family photos, children’s toys, pet accessories, and other personal items. Clearing refrigerator magnets and other personalized decor will help create a neutral, welcoming environment that appeals to a broader audience.
4. Minimize Seasonal Decorations
- Why: While festive decorations can add charm, they can also date your photos or limit their appeal to certain buyers.
- Action Steps: Consider scaling back on Christmas or seasonal decor. The goal is to create timeless photos that are relevant regardless of the time of year.
5. Stage Each Room
- Impact: Staging helps showcase each room’s potential and makes spaces feel inviting. Small adjustments can significantly enhance the visual appeal of your home.
- Action Steps: Go room by room, opening blinds to let in natural light and turning on lights to brighten the space. Make small, strategic changes like adjusting furniture placement or adding decorative touches that create a welcoming atmosphere.
6. Remove Window Screens
- Significance: Natural light is one of the most desirable features in a home, and window screens can diminish its impact by dulling the brightness and clarity of windows.
- Action Steps: Consider removing window screens before the photography session, especially if your home has scenic views. Clear, unobstructed windows will enhance the overall quality of your photos.
7. Add Pops of Color
- Why It Works: Colorful accents can make your photos more engaging and memorable. A splash of color can breathe life into a room, making it more visually appealing to potential buyers.
- Action Steps: Incorporate fresh flowers, vibrant throw pillows, or cozy blankets to add a touch of color and warmth. These elements can create focal points that draw the viewer’s eye and make the space feel more inviting.
By following these steps, you’ll ensure that your home is presented in the best possible light, both literally and figuratively. Well-prepared spaces not only photograph better but also attract more interest from potential buyers, increasing your chances of a successful sale.
Essential Tips and Techniques for Real Estate Photography
High-quality images are vital when it comes to marketing your home, making it essential that your photos are done well. Whether you’re a professional photographer or a homeowner looking to capture your property’s best features, following these tips and techniques will help you take exceptional real estate photos.
1. Portray an Honest Representation of the Home
- Why It Matters: The goal of real estate photography is to attract buyers by showing your home in the best light, but it’s crucial that the images accurately represent the property. Misleading photos can lead to disappointment during viewings, potentially deterring serious buyers.
- Technique: Focus on capturing the true size, layout, and flow of each room. Avoid overly dramatic angles or editing that could distort the reality of the space. Buyers appreciate authenticity, so ensure that your photos provide a genuine feel of the home.
2. Take Plenty of Photos
- Importance: While only 22-27 photos will be used in your listing, taking a larger number gives you a variety of options to choose from during editing. This approach ensures that you can select the best shots that truly highlight your home’s strengths.
- Technique: Capture multiple angles and different lighting conditions for each room. This variety will give you more flexibility when selecting the final images to use in your listing.
3. Capture Photos at Chest Height
- Why It Works: Photos taken at chest height provide a natural and realistic perspective, making viewers feel like they are actually inside the home. This height is ideal for most rooms, as it balances the proportions and minimizes distortion.
- Technique: Use a tripod to maintain a consistent height throughout your photo shoot, ensuring uniformity across all images.
4. Use a Wide-Angle Lens
- Benefit: A wide-angle lens allows you to capture more of the room in a single shot, giving potential buyers a comprehensive view of the space. However, it’s important to use this lens correctly to avoid distorting the room’s dimensions.
- Technique: Position the wide-angle lens at the room’s corners to maximize the sense of space without exaggerating the room’s size. This approach helps maintain an accurate representation of the room while showcasing its full potential.
5. Use Landscape Orientation
- Reasoning: Most real estate platforms prefer horizontal (landscape) orientation. This format is better suited to capturing the full breadth of rooms and aligns with how photos are typically displayed online.
- Technique: Always shoot in landscape mode to ensure your photos fit the standard formats used in listings, giving a more professional and cohesive look to your property’s photo gallery.
6. Highlight the Layout
- Why It’s Important: Buyers are not just interested in individual rooms but also in how the home flows. Photos that highlight the layout help buyers understand the relationship between different spaces, which is crucial for making a good impression.
- Technique: Take photos that naturally lead the viewer from one room to the next. Use angles that capture doorways and adjoining spaces, and consider shooting through open doors to emphasize the flow of the home.
7. Leave Doors Open Between Rooms
- Purpose: Open doors in photos help to visually connect rooms, providing a sense of the home’s layout and making spaces feel more accessible and inviting.
- Technique: Before shooting, walk through the home and decide which doors should remain open to best showcase the relationship between rooms.
8. Avoid Large Objects in the Foreground
- Impact: Large objects like furniture or décor pieces in the foreground can block important features and make rooms feel cramped in photos.
- Technique: Position large items, such as sofas or bookshelves, along the room’s edges, and ensure that they don’t dominate the frame. This will keep the focus on the room as a whole rather than on individual pieces of furniture.
9. Take Exterior Photos at an Angle
- Why It’s Effective: Shooting the exterior of your home at an angle allows you to showcase both the front façade and the depth of the property. This gives a more complete picture of the home’s size and curb appeal.
- Technique: Stand at a 45-degree angle to the front of the house, capturing both the front door and one of the sides. This approach emphasizes the home’s proportions and adds visual interest.
10. Watch the Position of the Sun
- Key Consideration: Proper lighting is crucial for exterior photos. The best time to shoot is when the sun is behind the camera, illuminating the front of the property. This prevents harsh shadows and ensures that the home is well-lit.
- Technique: Plan your shoot for a time when the sun is positioned to light up the front of the house. Early morning or late afternoon often provides the best light, with softer, more flattering illumination.
11. Shoot Interior Photos When It’s Brightest
- Why It Works: Natural light enhances the warmth and appeal of your home, making spaces feel open and inviting. Mid-day light is typically the brightest and most even, perfect for indoor photography.
- Technique: Schedule your interior shoot for mid-day when natural light is at its peak. Open all curtains and blinds to let in as much light as possible, and turn on indoor lights to eliminate shadows and brighten darker corners.
By following these tips and techniques, you’ll be well-equipped to capture stunning real estate photos that attract potential buyers and showcase your home in its best light.
Real Estate Photo Editing Tips
Once you’ve captured your real estate photos, the next step is editing to ensure they look their best. Whether you’re using a powerful tool like Photoshop or a more accessible online editor, these tips will help you enhance your images to attract potential buyers.
1. Use HDR (High Dynamic Range)
- What It Is: HDR is a technique where multiple photos of the same scene are taken at different exposure levels and then combined during editing. This process results in an image with a balanced exposure, revealing details in both the brightest and darkest areas of the photo.
- How to Use It: If your camera supports HDR, capture your images using this mode. Then, in your editing software, merge the images to create a final photo with enhanced lighting and depth. This is particularly useful for interior shots where lighting can be tricky, and for correcting distorted vertical lines caused by wide-angle lenses.
2. Swap a Gray Sky for a Blue Sky
- Why It’s Important: A bright, blue sky can significantly enhance the curb appeal of your home’s exterior photos. If you had to shoot on a cloudy day, don’t worry—editing can help.
- How to Do It: Use tools like Photoshop, Photoshop Express, Pixlr, or Lightroom to replace a dull gray sky with a vibrant blue one. Many of these tools offer sky replacement features that allow you to seamlessly swap skies without affecting the rest of the image. This simple change can make your exterior photos much more inviting.
3. General Editing: Crop, Brighten, and Fix Blemishes
- Cropping: Adjust your images to remove any unwanted elements or distractions at the edges of the frame. Cropping can also help to better center your subject and create a more balanced composition.
- Brightening: Real estate photos should be bright and inviting. Use your editing software to increase the brightness and contrast of your images, ensuring that they are well-lit without looking overexposed. This is especially important for interiors where natural light may be limited.
- Blemish Fixing: Even the cleanest homes can have minor imperfections that show up in photos. Use the blemish removal tools in your editing software to fix small issues like scuff marks, smudges, or spots on walls and floors. However, be careful not to over-edit, as you want to maintain the photo’s authenticity.
4. Correct Vertical Lines
- Why It Matters: Vertical lines, such as those from walls, doors, and windows, should appear straight in real estate photos. However, wide-angle lenses often cause these lines to appear distorted, which can make rooms look warped.
- How to Correct: Most photo editing tools, including Photoshop and Pixlr, offer perspective correction features that allow you to straighten these lines. This small adjustment can make your photos look more professional and the spaces more true to life.
5. Enhance Colors and Contrast
- Boosting Appeal: Enhancing the colors and contrast in your photos can make them more visually appealing. Increase the saturation slightly to make colors pop, but be careful not to overdo it, as this can make the photo look unnatural.
- How to Do It: Use the color correction tools in your editing software to adjust the saturation, contrast, and vibrancy of your images. Aim for a balanced look that enhances the image without making it look overly processed.
6. Sharpen Your Images
- Clarity is Key: Sharp images look more professional and can make details stand out, which is crucial in real estate photography.
- How to Sharpen: Most editing tools have a sharpening feature that you can use to enhance the clarity of your photos. Apply this tool subtly to avoid making the image look harsh or grainy.
7. Consider Batch Editing for Consistency
- Efficiency and Uniformity: If you have multiple photos to edit, consider using batch editing to apply the same adjustments across all images. This not only saves time but also ensures consistency in lighting, color, and tone across your entire photo set.
- How to Use: Most advanced editing tools like Photoshop allow you to record a series of edits and then apply them to multiple images at once. This feature is particularly useful for ensuring that all photos in your listing have a cohesive look.
By applying these editing techniques, you can elevate the quality of your real estate photos, making your property more attractive to potential buyers. Whether you’re doing the editing yourself or working with a professional, these tips will help you present your home in the best possible light.
Photographing Real Estate 101: A Comprehensive Checklist
When preparing your home for a real estate listing, capturing high-quality photographs is crucial to attracting potential buyers. Consider this your ultimate photography checklist to ensure you don’t miss any key shots that can help your property stand out. Make sure you capture each of these spaces to create a well-rounded and compelling listing.
Must-Have Photographs
These are the essential shots that every real estate listing should include. These rooms are of the highest interest to buyers and should be photographed with care:
- Bedrooms: Showcase the size, natural light, and any special features like walk-in closets or en-suite bathrooms.
- Kitchen: Highlight countertops, cabinetry, appliances, and any unique elements like an island or breakfast corner.
- Living Room: Capture the spaciousness, natural light, and focal points such as fireplaces or large windows.
- Bathrooms: Ensure bathrooms look clean and fresh. Focus on features like vanities, showers, and tubs.
Nice-to-Have Photographs
These additional shots can enhance your listing by showcasing outdoor spaces and amenities that add value to the property:
- Balcony or Terrace: Show off outdoor living spaces that are perfect for entertaining or relaxing.
- Landscaping: Highlight well-maintained gardens, lawns, or any unique landscaping features.
- Pool or Sauna: Capture these luxury amenities, making sure to show them in a clean and inviting state.
- Craft room: If your property includes a Craft room or garage space, include photos that display its functionality and potential.
- Outbuildings: Any additional structures on the property, such as sheds, barns, or garden houses, should be photographed to showcase extra value.
Real Estate Shots That Sell
To really make your listing stand out, consider including photos that highlight special features and aspects of your home that are particularly desirable in your market:
- Popular Local Features: Work with with us to identify features that are in demand in your area.
- Features That Justify Higher Prices: Certain features can help justify a higher price or reduce the time your home stays on the market. Examples include steam showers, professional-grade appliances, and solar panels. If your home includes these, make sure to highlight them.
- Views: If your home has notable views—whether it’s water, mountains, or cityscape—capture these in your photos. Views from windows or balconies can be a significant selling point.
- Architectural Details: Showcase any unique architectural features that add character to your home, such as wainscoting, exposed beams, or detailed tile work. These elements can appeal to buyers looking for a home with distinct style.
- Recently Updated Spaces: If you’ve recently renovated or updated any part of your home, make sure to show it off. Updated kitchens, bathrooms, and other areas are big selling points.
Bonus Shots
For an extra touch that can really make your listing stand out, consider these additional shots:
- An Exterior Shot from the Curb: Show off the curb appeal of your home. A well-composed exterior shot can make a strong first impression.
- An Exterior Shot at Night: Capture the home with lights glowing from the interior for a warm and inviting look.
- A Dusk Shot on a Clear Night: Dusk shots can create a beautiful, serene atmosphere. The soft lighting can make your home look especially appealing.
- An Exterior Shot with the Front Door Open: This creates a welcoming scene, inviting potential buyers to imagine themselves stepping into their new home.
- Drone Footage or Aerial Views: Aerial shots can provide a unique perspective of the property and surrounding area, showcasing the full extent of the land and neighborhood.
- 3D Home Tours and Video Walkthroughs: Adding these can double the number of shopping views and increase the frequency that your home is saved by potential buyers on platforms like Homegate or Newhome. These interactive elements give buyers a comprehensive view of your home, enhancing their online experience.
By following this checklist and capturing these key shots, you’ll create a compelling real estate listing that highlights the best aspects of your home, increasing its appeal to potential buyers and helping you achieve a successful sale.
Avoid Real Estate Photography Mistakes
While great real estate photos can make a powerful impression, even small mistakes can detract from your listing and turn off potential buyers. To ensure your photos shine, it’s important to be aware of common pitfalls and how to avoid them. Here are some of the most frequent real estate photography errors to watch out for:
1. The Photographer’s Reflection in a Mirror or Window
- Why It’s a Problem: Seeing the photographer’s reflection in a mirror or window distracts from the focus of the image and can make the photos look unprofessional.
- How to Avoid It: Be mindful of reflective surfaces when positioning yourself for a shot. If a mirror or window is unavoidable, adjust your angle or use photo editing software to remove any visible reflections.
2. Pets in the Shot
- Why It’s a Problem: While pets can be adorable, they can also be distracting in real estate photos. Not all buyers are pet lovers, and some may even see pets as a sign of potential damage or odors.
- How to Avoid It: Make sure pets are out of the house during the photo shoot. Check each room for pet toys, beds, or food bowls, and remove these items before taking photos.
3. Television On
- Why It’s a Problem: A turned-on television can be distracting and may clash with the aesthetic of the room. It can also create unwanted light reflections and glares in your photos.
- How to Avoid It: Turn off all televisions and other screens during the photo shoot to keep the focus on the room’s features.
4. Fingerprints on Surfaces
- Why It’s a Problem: Fingerprints on surfaces like stainless steel appliances, glass, or countertops are easily visible in photos and can make the home look dirty or unkempt.
- How to Avoid It: Before shooting, wipe down all surfaces to remove fingerprints and smudges, ensuring they look pristine in photos.
5. Raised Toilet Seat Lids
- Why It’s a Problem: An open toilet seat lid can be an eyesore in bathroom photos and detracts from the overall cleanliness of the space.
- How to Avoid It: Always lower toilet seat lids before photographing bathrooms for a more polished and appealing image.
6. Cars or Other Distractions Captured Through Windows
- Why It’s a Problem: Vehicles, pedestrians, or other distractions seen through windows can take attention away from the home’s interior and disrupt the visual appeal of the shot.
- How to Avoid It: Pay attention to what’s visible through windows. If necessary, wait for a clear moment to take the shot, or use photo editing software to remove unwanted distractions.
7. Unsightly Items in Exterior Shots
- Why It’s a Problem: Items like electrical wires, dumpsters, or parked cars can detract from the curb appeal of your home in exterior photos.
- How to Avoid It: Carefully choose angles that minimize or exclude these elements. In post-editing, you can also remove or diminish the impact of any unsightly items that couldn’t be avoided during the shoot.
8. Including Images of Tiny Rooms
- Why It’s a Problem: Photos of small spaces like closets, laundry rooms can make your listing feel cramped, especially if these areas don’t have any special features.
- How to Avoid It: Unless a small room has a unique selling point, such as custom cabinetry or high-end appliances, it’s better to leave these images out of the listing.
9. Including Images of Structural Issues or Unfinished Rooms
- Why It’s a Problem: Photos of unfinished rooms or visible structural issues can raise red flags for buyers and may make your home less appealing.
- How to Avoid It: If a room is mid-remodel or has visible issues, avoid including it in your photos. Instead, focus on the finished and attractive parts of your home.
10. Vertical Line Distortion
- Why It’s a Problem: When a camera is tilted up or down, it can cause vertical lines (like walls and door frames) to bow inward or outward, creating a distorted view of the space.
- How to Avoid It: Always keep your camera level when shooting, and use photo editing software to correct any distortion in post-production.
11. Using a Cell Phone to Take Pictures
- Why It’s a Problem: While smartphone cameras have improved, they often lack the quality, depth, and wide-angle capability needed for professional real estate photography.
- How to Avoid It: Invest in a professional photographer or use a high-quality camera with a wide-angle lens to ensure your photos meet industry standards.
12. Using a Fish-Eye Lens
- Why It’s a Problem: Fish-eye lenses can exaggerate the size of rooms, making them look unnaturally large. This can lead to disappointment when potential buyers see the home in person.
- How to Avoid It: Stick to wide-angle lenses that provide a realistic portrayal of space without distorting the proportions. This will give buyers an accurate sense of the home’s layout and size.
By avoiding these common real estate photography mistakes, you’ll be able to present your home in the best possible light, making it more attractive to potential buyers and increasing your chances of a successful sale.
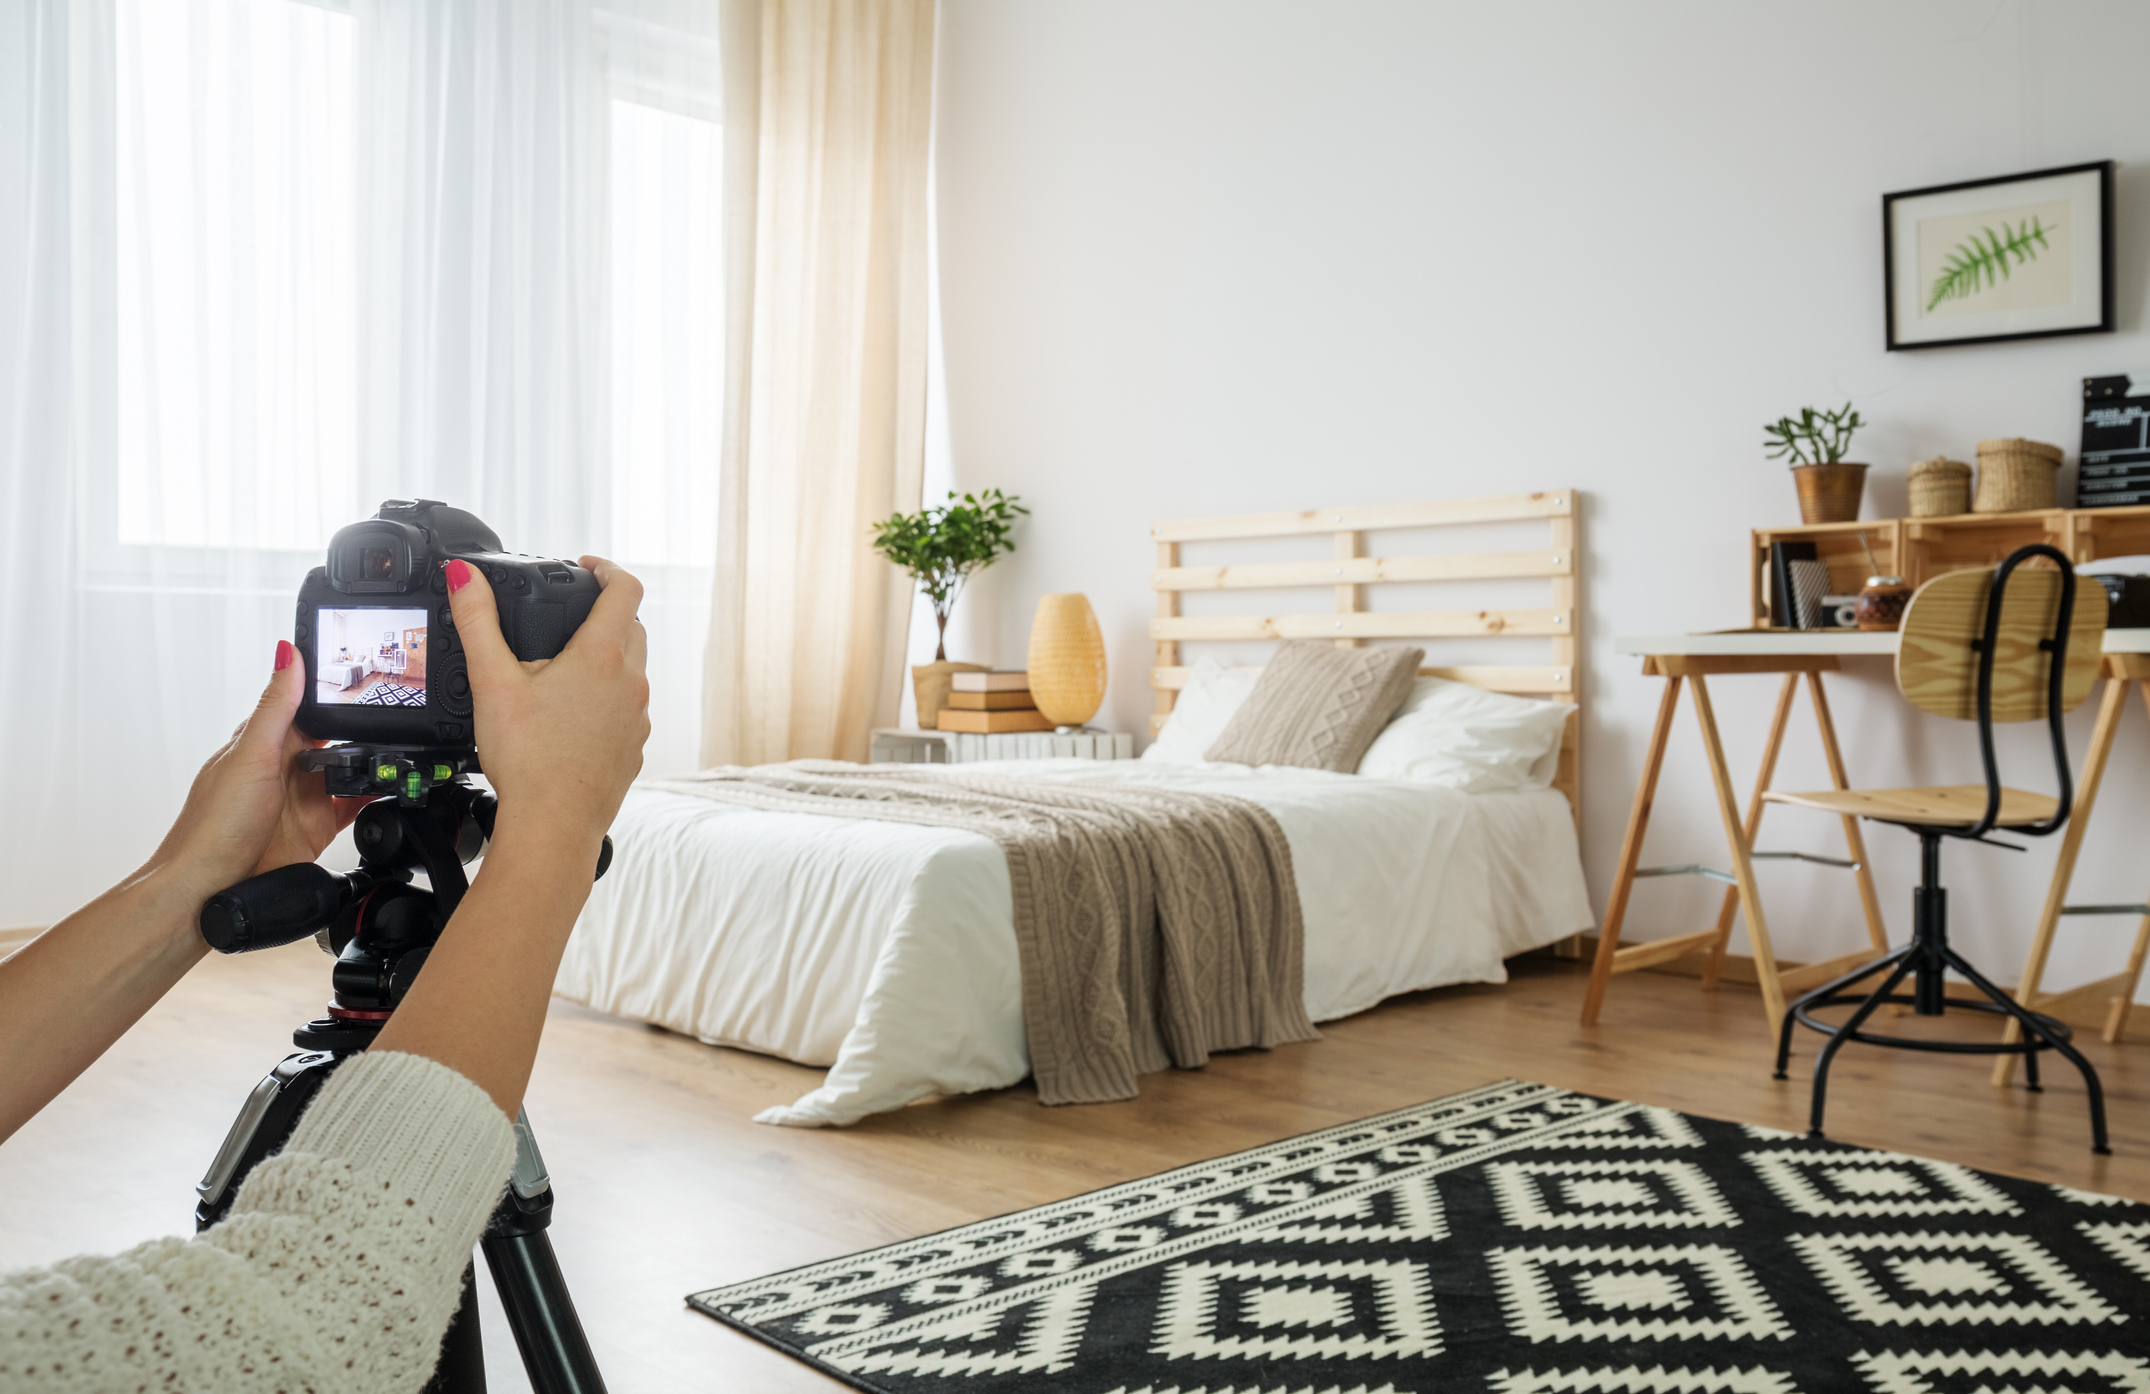
Essential Equipment for Real Estate Photography
Whether you’re planning to take high-quality photos of your own home or exploring the field of professional real estate photography, having the right equipment is crucial for producing stunning, high-resolution images that can make a property stand out. Here’s a list of essential gear you’ll need to capture the best real estate photos:
1. A Professional Camera
- Why It’s Important: A full-frame digital SLR (DSLR) or mirrorless camera is the cornerstone of real estate photography. These cameras come with a large sensor, providing a wider field of view and superior image quality, especially in low-light conditions.
- What to Look For: Choose a camera that offers high resolution (at least 20 megapixels), excellent dynamic range, and the ability to shoot in RAW format, which allows for greater flexibility in post-processing.
2. A Wide-Angle Lens
- Purpose: A wide-angle lens is essential for capturing the full scope of each room, allowing potential buyers to see more of the space in a single image. This type of lens provides depth and detail that are crucial for making rooms appear spacious and inviting.
- Recommended Specs: Look for a lens with a focal length between 10mm and 24mm for crop-sensor cameras or 16mm to 35mm for full-frame cameras. This range will allow you to capture wide shots without significant distortion.
3. A Tilt-Shift Lens
- Why It’s Necessary: Tilt-shift lenses are designed to correct perspective distortion, which is a common issue in real estate photography when shooting buildings or rooms. This lens helps keep vertical lines straight, preventing the “falling over” effect that occurs when the camera is tilted up or down.
- When to Use It: This lens is especially useful for shooting exteriors and interiors where maintaining straight lines is crucial for a professional look.
4. A Tripod
- Importance: Stability is key to capturing sharp, clear images, especially in low-light conditions. A tripod allows you to use slower shutter speeds to let in more natural light without the risk of camera shake.
- Features to Consider: Choose a sturdy tripod with adjustable height and a level head. This will allow you to maintain consistent framing and angle across all your shots.
5. Multiple Flashes
- Why You Need Them: Real estate photography often requires supplemental lighting to evenly illuminate larger rooms or areas with poor natural light. Multiple flashes allow you to light different parts of a room simultaneously, reducing harsh shadows and highlighting key features.
- Usage Tips: Use wireless flash triggers to position your flashes around the room strategically, ensuring even lighting throughout the space.
6. Light Stand
- Purpose: A professional light stand holds your flashes or other lighting equipment securely in place, allowing you to direct light precisely where it’s needed. This is especially important for balancing natural and artificial light in larger rooms.
- What to Look For: Invest in a sturdy, adjustable light stand that can reach different heights and angles, giving you flexibility in how you light various spaces.
Additional Accessories
- Memory Cards: High-speed, high-capacity memory cards are essential for storing large files, especially when shooting in RAW format.
- Remote Shutter Release: A remote allows you to trigger the camera without physically touching it, reducing the risk of camera shake during long exposures.
- Lens Filters: Polarizing and neutral density filters can help manage reflections and control exposure, particularly in bright outdoor conditions.
- Photo Editing Software: Investing in software like Adobe Lightroom or Photoshop is crucial for post-processing, allowing you to enhance and correct your images to perfection.
By equipping yourself with these tools, you’ll be well-prepared to produce high-quality, professional real estate images that can significantly enhance the appeal of any property. Whether you’re a homeowner looking to sell or an aspiring real estate photographer, this gear will help you capture photos that stand out in today’s competitive market.
